Table of Contents
Markers
Markers are moments in time that have labels. You can create any number of markers in your Rosegarden composition, to define particular points that you wish to remember the locations of. Marker positions and labels will be saved in your Rosegarden file.
Markers are shown in the main ruler at the top of each of Rosegarden's editor windows.
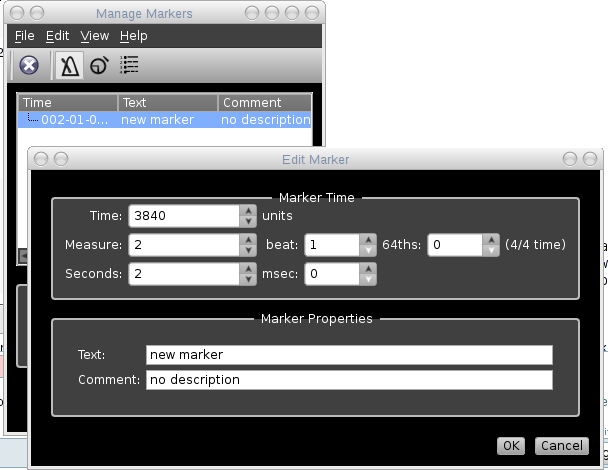
To add a new marker, double-click on the marker area (top half) of the ruler to open the marker editor. Make sure Rosegarden's playback pointer (see The Transport) is in the location you want to add the marker, and then click the Add button to add a new marker at the playback position. You can then double-click on the marker's entry in the marker editor window to edit its name or adjust its location.
Click on the text of a marker in the marker ruler to move the playback pointer directly to that marker.
You can set a loop range between two marker positions, by clicking in the area between the markers in the marker ruler with the Shift key pressed.
Quick Marker
The quick marker is a special moment in time that can be defined on the fly with a single key (by default Ctrl+1) from the main window (track editor). Once defined it appears as a red line in the loop ruler (it does not appear among other markers, since it does not have a label). At any time when in the track editor you can jump to the quick marker position with a single key (by default simply 1).
A typical use of the quick marker is when you want to record the same bars on different instruments: after setting the quick marker at the first bar of the working interval, it is easy to jump to the quick marker each time you need to record a new part.
Note that the quick marker position is not saved in your Rosegarden file.
Ranges and loops
Rosegarden allows you to highlight a period of time in the main ruler, which will be used as a “range” for editing operations and which will be looped during playback.
To set the current range, click and drag with the Shift key pressed on the subdivided area of the main ruler at the top of the editing window. The range that you drag will be highlighted in white as you drag it, and will snap to the nearest beat boundary at both ends. Any subsequent playback will then be constrained to looping this range.
You can also set a range between two markers by shift-clicking between the marker positions in the marker ruler, or set a range using the transport window. The transport contains small buttons to set the start and end of the current range to the current playback pointer position. Either of these methods allows you to set more precise end points for your range than you can with click-drag.
To clear a range and restore normal playback, click on the subdivided area of the main ruler with the Shift key pressed, or toggle the loop button on the transport.
Note that playback looping when a range is defined is not the same thing as repeating segment available in the segment parameters (which seamlessly repeats individual segments rather than causing the transport to jump).
Range editing
You can carry out edits on the current range in order to cut and paste sections of music that include the relevant parts of all segments, tempos and time signatures within the range.
Set a range and then use Edit → Cut Range or Copy Range to cut or copy the range to the clipboard.
You can paste a range using Edit → Paste to overlay its contents onto the rest of the composition at the current playback pointer position, or you can use Edit → Paste Range to insert the range from the clipboard into the composition at the current playback pointer position.
Inserting a range
You can also insert an empty range at the current playback position using Edit → Insert Range. You can specify how much space you want to insert, and then all of the segment content, tempos, and time signatures following the playback position will be pushed along in time by that duration to leave an empty space.


