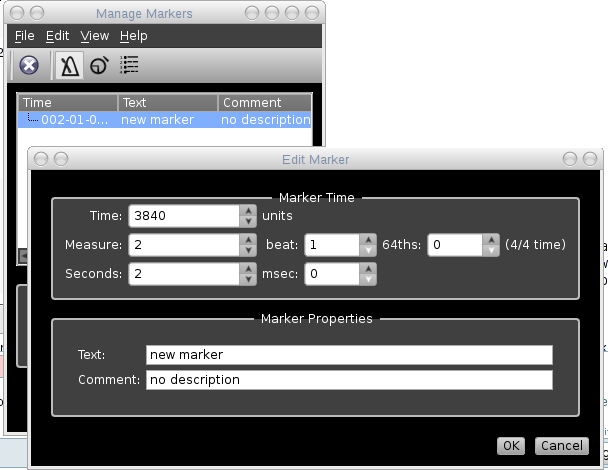
マーカーマーカーはラベルを持つ、時間軸の特定の位置です。Rosegardenコンポジション中に、その場所を覚えておきたい、特定の場所を定義するために、任意の数のマーカーを作成出来ます。マーカーの位置とラベルは使用しているRosegardenファイル中に保存されます。 マーカーは、各Rosegardenエディタウィンドウの最上位のメインルーラ中に表示されます。 新しいマーカーを追加するために、マーカーエディタを開くために、ルーラのマーカー領域をダブルクリックします(上半分)。Rosegardenの再生ポインタ(The Transportを参照してください)が、マーカーを追加したい位置にあるようにして、 To add a new marker, double-click on the marker area (top half) of the ruler to open the marker editor. Make sure Rosegarden's playback pointer (see The Transport) is in the location you want to add the marker, and then click the Add button to add a new marker at the playback position. You can then double-click on the marker's entry in the marker editor window to edit its name or adjust its location. Click on the text of a marker in the marker ruler to move the playback pointer directly to that marker. You can set a loop range between two marker positions, by clicking in the area between the markers in the marker ruler with the Shift key pressed. クィックマーカークイックマーカーはメインウィンドウ(トラックエディタ)から単一のキー(既定値ではCtrl+1)で、必要に応じて定義できる、時間単位での特別な場所です。一度定義されると、ループルーラ中で赤いラインとして表示されます(ラベルを持たないので、他のマーカーの間では表示されません)。トラックエディタ中で、任意の時間で、単一のキー(既定値では単に1)を使う事でクイックマーカーにジャンプすることが出来ます。 典型的なクイックマーカーの使い方は、異なったインストゥルメント上で同じ小節に録音したい場合です:作業中のインターバルの最初の小節にクィックマーカーを設定した後、新しい部分を録音する必要がある時は毎回、クィックマーカーにジャンプするのは簡単です。 クィックマーカーのポジションのはRosegardenファイル中にセーブされないことに注意してください。 レンジとループRosegarden allows you to highlight a period of time in the main ruler, which will be used as a “range” for editing operations and which will be looped during playback. To set the current range, click and drag with the Shift key pressed on the subdivided area of the main ruler at the top of the editing window. The range that you drag will be highlighted in white as you drag it, and will snap to the nearest beat boundary at both ends. Any subsequent playback will then be constrained to looping this range. You can also set a range between two markers by shift-clicking between the marker positions in the marker ruler, or set a range using the transport window. The transport contains small buttons to set the start and end of the current range to the current playback pointer position. Either of these methods allows you to set more precise end points for your range than you can with click-drag. To clear a range and restore normal playback, click on the subdivided area of the main ruler with the Shift key pressed, or toggle the loop button on the transport. Note that playback looping when a range is defined is not the same thing as repeating segment available in the segment parameters (which seamlessly repeats individual segments rather than causing the transport to jump). レンジの編集You can carry out edits on the current range in order to cut and paste sections of music that include the relevant parts of all segments, tempos and time signatures within the range. Set a range and then use Edit → Cut Range or Copy Range to cut or copy the range to the clipboard. You can paste a range using Edit → Paste to overlay its contents onto the rest of the composition at the current playback pointer position, or you can use Edit → Paste Range to insert the range from the clipboard into the composition at the current playback pointer position. レンジの挿入You can also insert an empty range at the current playback position using Edit → Insert Range. You can specify how much space you want to insert, and then all of the segment content, tempos, and time signatures following the playback position will be pushed along in time by that duration to leave an empty space. |


