
Recording
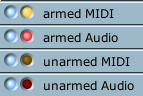
To record a new segment into a track, first make sure the right tracks are armed for recording by selecting the red (for audio tracks) or yellow (for MIDI tracks) LED-style buttons on the track labels, and then use the Transport's record control. This has the effect of both starting the transport, thus playing the existing composition, and recording into the appropriate track, or tracks.
You can record any number of MIDI and audio tracks at once so long as your computer is powerful enough, and you have enough disk space. Be careful not to accidentally leave tracks selected when you have finished using them and are trying to record somewhere else.
Alternatively you can use punch-in record to separate the acts of starting the transport and entering record mode. Punch-in record is toggled with the Space bar. You can press Space while playing a composition to switch instantly between playback and recording without stopping the transport, or you can use Space to arm for recording when the transport is stopped, so that a subsequent Play will in fact record as well. (The latter is handy when synchronising to an external transport.)
If you record to MIDI tracks, you will record from the MIDI devices that are selected for recording in the MIDI device manager, as filtered through the track level recording filter and the global MIDI filters.
If you record to audio tracks, your recording to each track will be from the input currently selected for that track's instrument in the instrument parameter box. This will either be an external audio input or an audio submaster or master (for performing mixdowns). If it's an external input, it will by default record from your soundcard's first available physical record in. You may wish to use a JACK connection tool to connect some other JACK audio application to the input instead. See also Audio Routing.